How to Preserve Traction by Managing Load

The amount of traction depends on tires, pavement and load.

Last weekend I conducted a seminar at the Thompson Speedway (in CT) and I thought I’d share a particular concept that came up during the presentation… the concept of “load management”.
When I first verbalized the term, I thought it sounded like the material for a crass poop joke. But, it is a concept I believe every motorcycle rider should adopt as a way to ensure that you have a sufficient amount of traction.

Traction Theory

Before I talk about specifics of load management, it makes sense to lay some theory on you. In its most basic form, traction is the friction between your tires and the road or track surface. This friction can vary greatly depending on several factors, including tire compound, condition and temperature, as well as the quality of the pavement surface (or dirt for you dualies out there).

Pavement texture affects the amount of traction available.

But wait. The quality of your tires and the surface is only part of the traction equation. The other part is the amount of load that is placed on the tire’s contact patch. The more weight or load that each tire is supporting directly relates to the amount of grip each tire has.

Practical Application

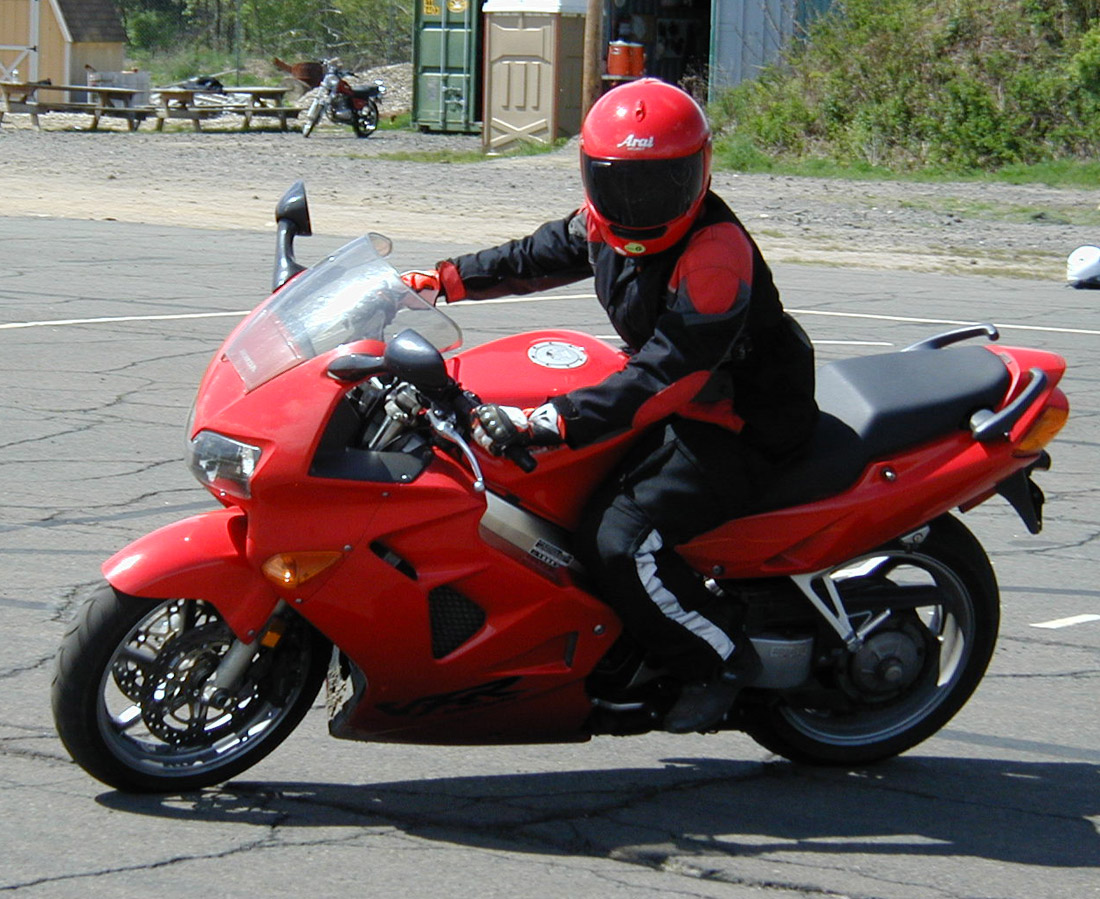
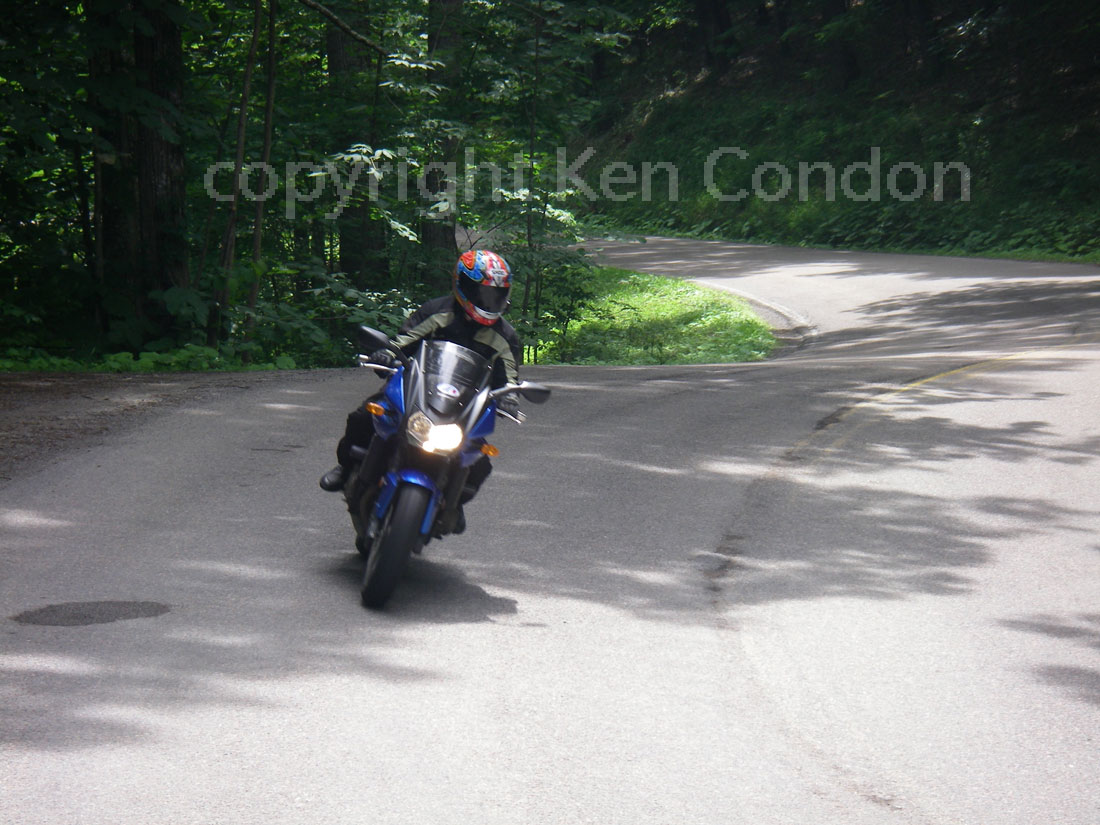
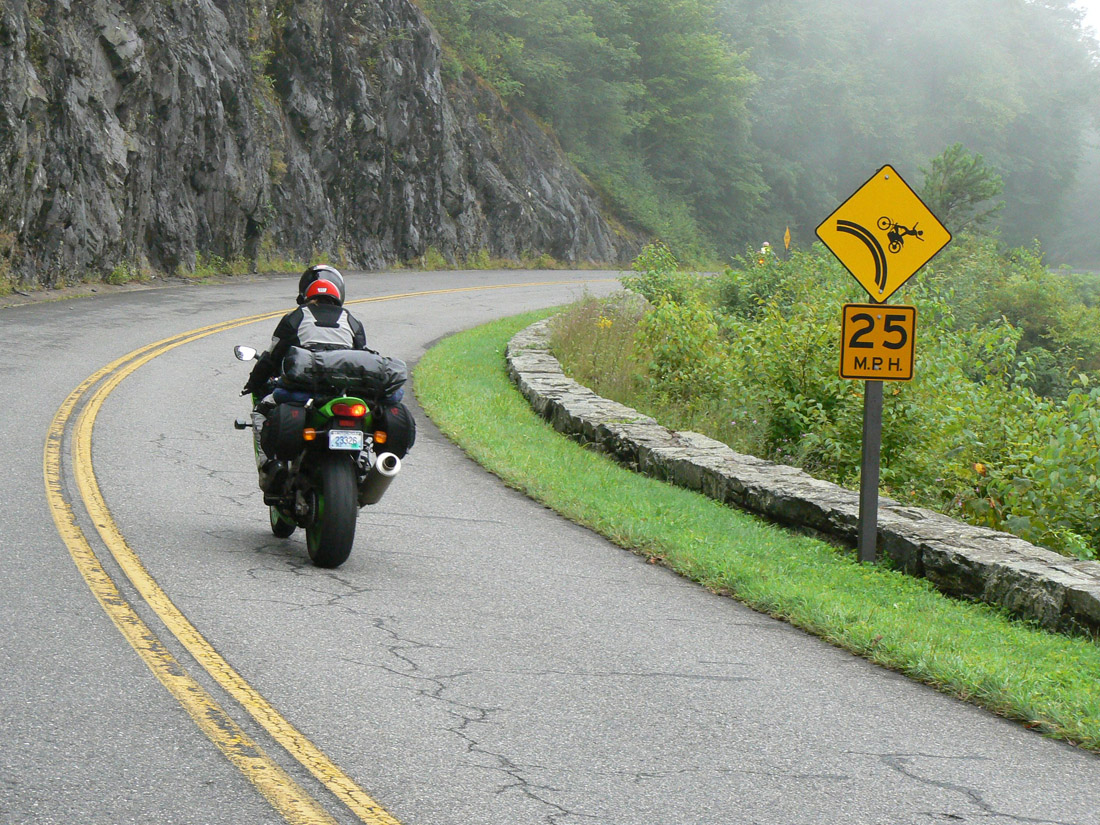
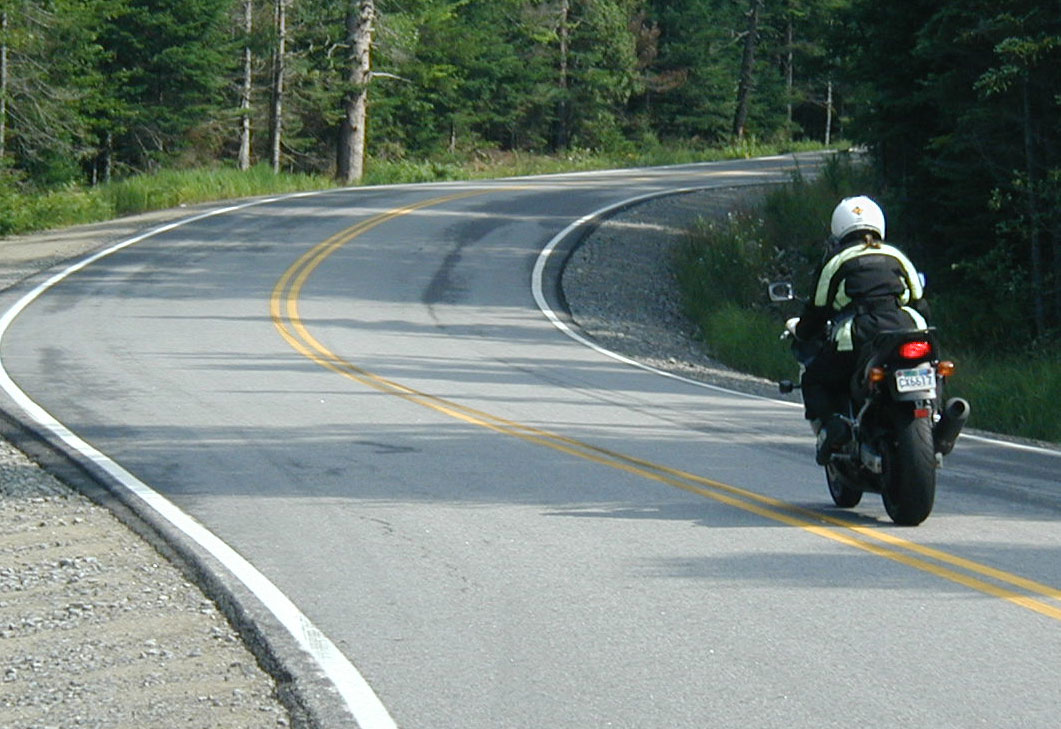
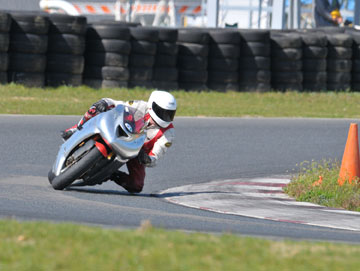
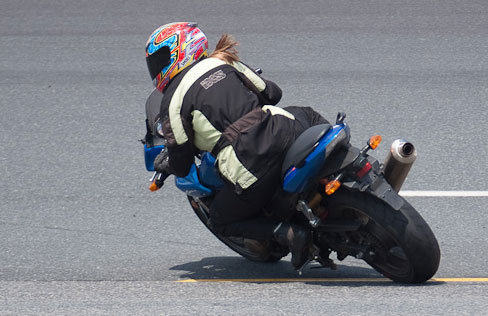
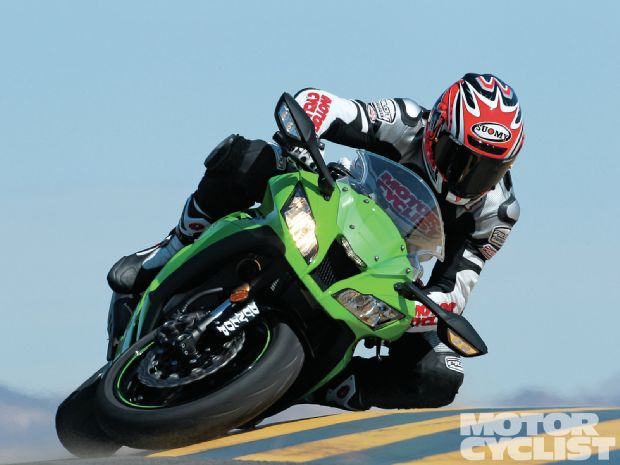
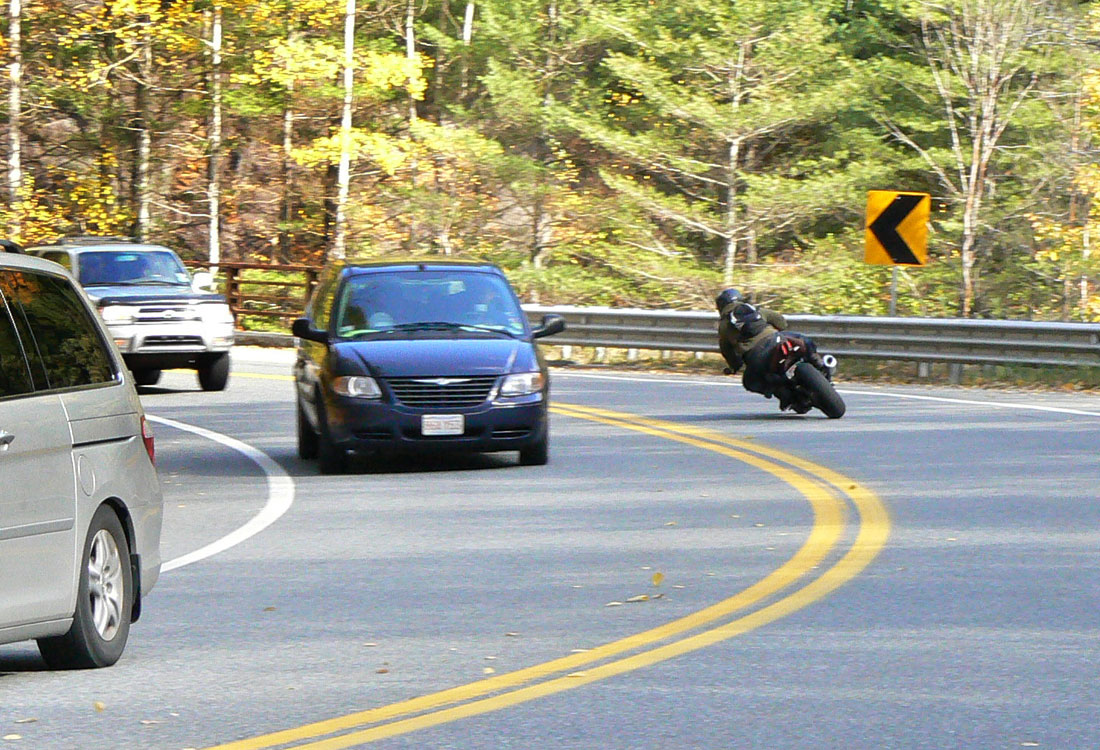
When you brake, the front suspension compresses as the weight of rider and bike pitches forward. This increases front tire traction. But, at the same time, the rear suspension extends and the load (and traction) at the rear tire decreases. More traction on the front means you can use the front brakes harder. But, it also means that there is less load at the rear and therefore less rear tire grip for hard use of the rear brake. Load shifts constantly with every maneuver you make…braking, cornering, swerving, accelerating etc.
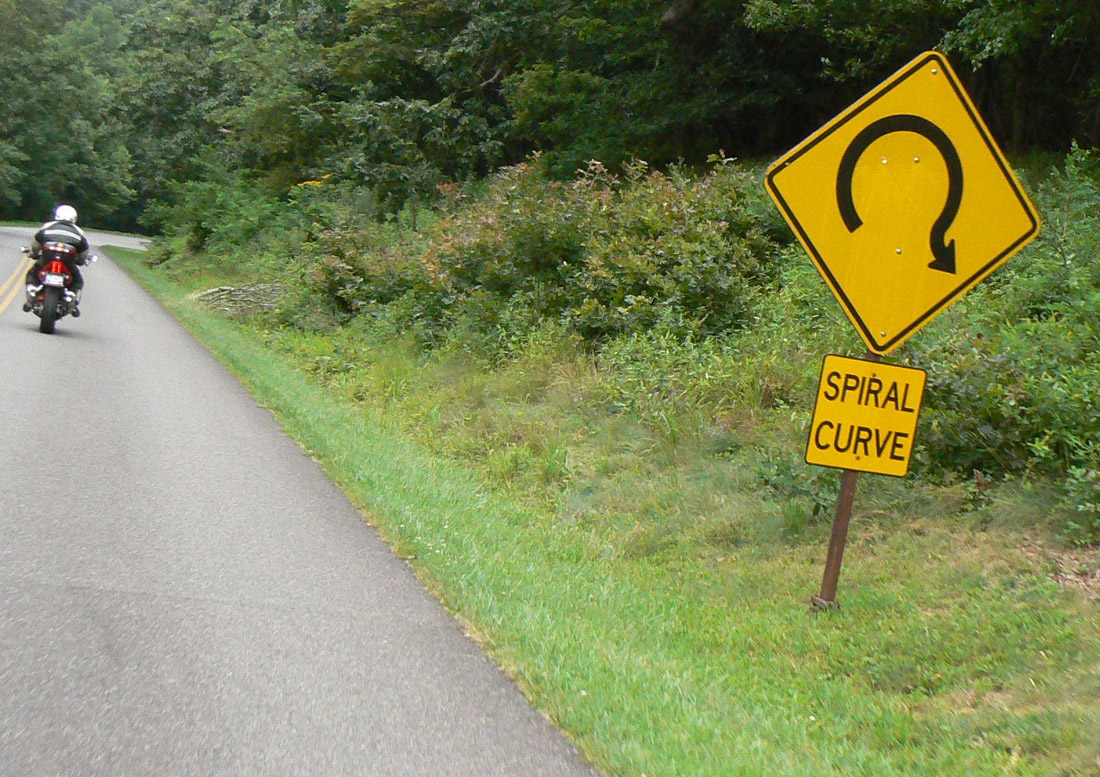
Loads also shift with the terrain. Riding uphill shifts weight rearward. Riding downhill moves the load to the front. Riding over bumps also causes momentary shifts in load and changes in traction. Road camber also affects load.

Managing Your Load

If you grab the front brake, you'll skid the front tire.
If you grab the front brake, you’ll skid the front tire.

So, managing traction requires you to manage the location and amount of load. This means making sure your front tire is sufficiently loaded before you introduce maximum front brake force. Squeeeeeze the front brake lever. It also means easing off the rear brake as load pitches forward when you brake. The key is to apply the brakes only as much as the tire can handle, which means paying attention to the amount of load there is on each tire.
Now, too much of a good thing is too much of a good thing. In this case, you can overwhelm the front tire while braking and skid. However, if you squeeze the front brake progressively then you should not have this problem. If you grab the brake, then you risk locking the front wheel.
Managing traction while cornering downhill requires balance between speed control and acceleration.

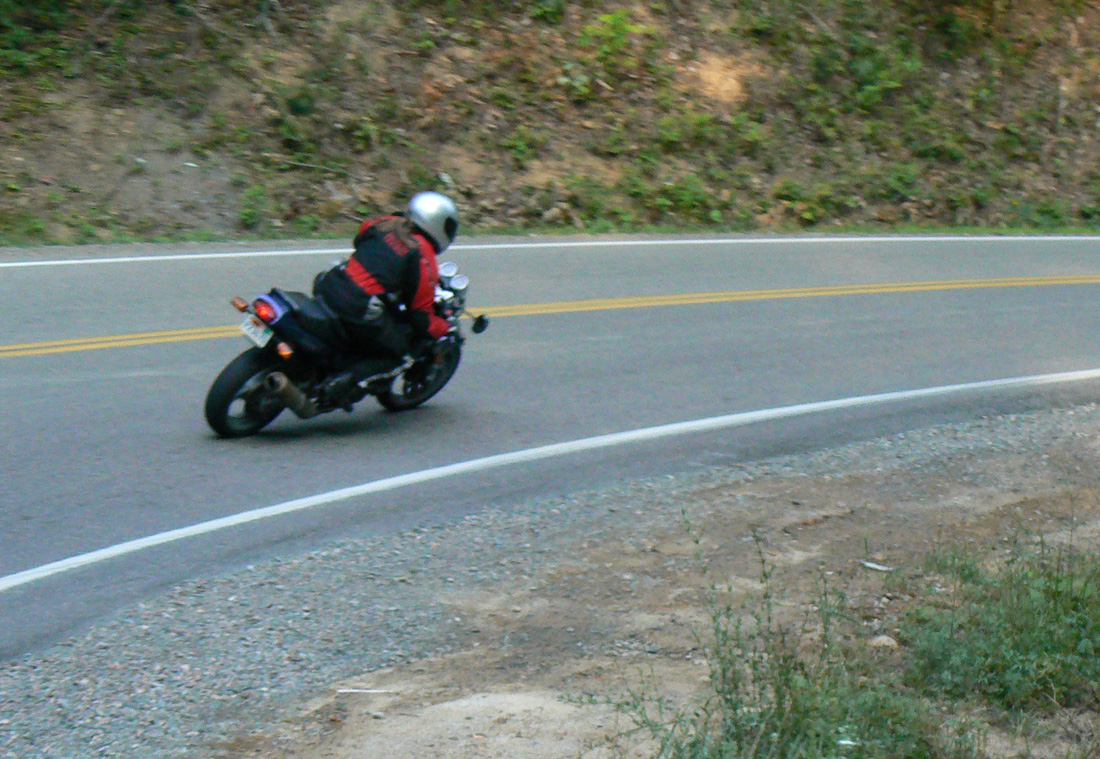
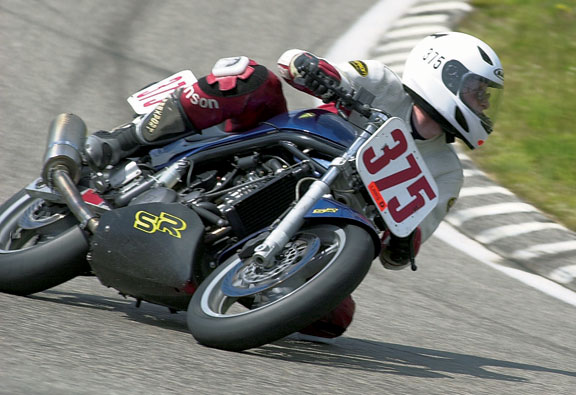
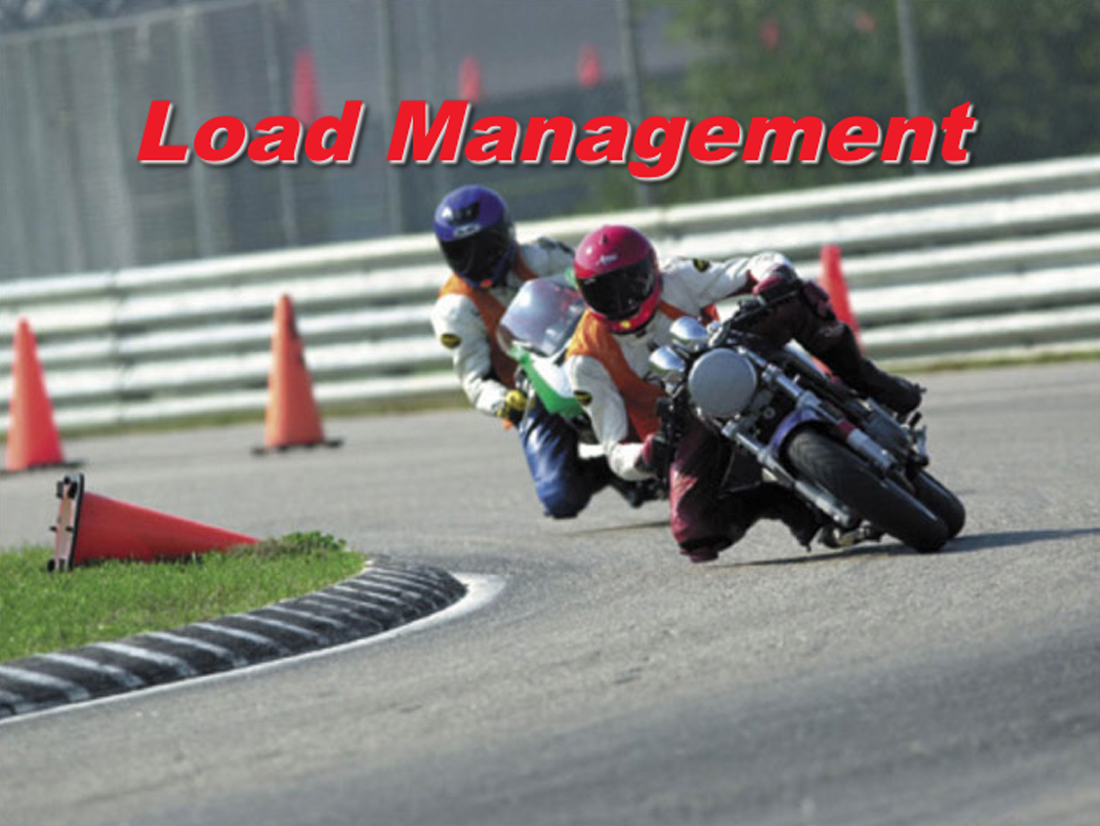
You can also overwhelm and push the front tire into a lowside skid when cornering hard. To avoid this, you need to get on the throttle just after you initiate lean to balance load between the front and rear. If you coast through the turn, you’re asking the front tire to not only manage the cornering forces, but also the engine braking forces caused by not getting on the gas.
The amount of throttle used should be just enough to transfer load to the rear tire. Do this by gradually rolling on the throttle. DO NOT twist the throttle to the stop or you’ll overwhelm the rear tire and spin it out of control.
The best riders are keenly aware of the amount of traction they have available at any given time. They also use advanced techniques that minimize abrupt spikes in load and allow the tires to maintain grip.Some of these techniques include brake and throttle overlap, trailbraking, and advanced body positions that allow the suspension to work fluidly.
Start by paying attention to how load affects traction, then move on to developing these advanced techniques for load and traction management. I’ll write about these techniques in future blog posts, but you can read about them now by ordering your copy of Riding in the Zone.
In the meantime, click here to read more about traction and How to Develop a Traction Sense.
Share your thoughts below on how you manage traction and load.
Subscribe to the mailing list!
Buy the Book!


Please Donate to Keep the Articles Coming

If you liked this article and the many other articles on this site, please toss a buck or five into the hat. It’s greatly appreciated!

    • Click the PayPal “Pay Now” button.
    • Then indicate quantity in $2.00 increments. Example: put “2” in “QUANTITY” field to donate $4.00, “3” for a $6.00 donation, etc.

Why $2.00? Due to the PayPal fee structure, a $2.00 donation is significantly more beneficial compared to a $1.00 donation.

Thank You!


How Can I help You? Online Coaching NOW AVAILABLE
Stay Informed: Subscribe NOW!
Trianing-Tours_LandingBe a Better Rider: Sign Up for Personal Training with Ken
Support Riding in the Zone: Buy a book
Support Riding in the Zone: Buy products from Twisted Throttle & Amazon
Twisted_Affiliate-Interphone-widget


How to Survive Hairpin Turns

Practice tight turns in a parking lot.

The biggest problem riders have when dealing with hairpin turns is their anxiety about being able to make the turn. It’s a good idea to practice tight turns in a parking lot before you encounter challenging hairpin turns. Read more about slow speed riding techniques.

Slow Approach

One of the most likely reasons for a crash in a corner is entering too fast. When dealing with downhill hairpin turns, you also have the additional force of gravity pushing you downhill.
The trick is to get your bike slowed early and smoothly and then carry a bit of brake force past turn in to keep the bike stable, Read about trailbraking for more detail. Just be sure the surface is clean enough to allow slight braking while cornering.

Throttle On

When making slow turns, it is important that you maintain slight, steady forward drive for stability. If you chop off the throttle, you’ll probably fall.
A bit of forward drive takes some of the load off the front tire when going downhill and gives you forward momentum when going up a hill. It also maximizes ground clearance.
But, be careful. If you are abrupt with the throttle, either by accelerating too hard or by chopping off the throttle, you risk running wide, overtaxing the tires and upsetting the chassis and balance

Downhill turns are challenging enough to put a sign up.

When approaching a downhill hairpin curve you need to slow down more to manage gravity, but also to allow you to crack the throttle slightly for maximum stability. From a slow entry speed, give the bike enough throttle (as soon as you begin to lean) to maintain steady drive through the whole curve. Try not to decelerate. Be sure to look well into the turn, at the corner exit.

Uphill Hairpins

When going uphill, you can approach with a bit higher speed. But, slow down enough to allow steady throttle throughout the whole turn. Be sure not to use too much throttle that you cause the front tire to lose traction and “skate”, which can push your bike too far to the outside of the turn. You also don’t want to overload the rear tire with too much acceleration force. Steady, gradual throttle at the beginning of the turn is the key. Again, keep your eyes pointed all the way to the turn’s exit.

Look through the turn and accelerate slightly.

Enough Speed

Whether going up or down hill, you need to keep your speed above about 10 mph to maintain balance and stability. Sometimes, people simply fall over because they are going too slow. At very low speeds, slight deceleration or shift in body weight (tell passengers to remain relaxed, but still) is enough to upset balance and cause a tip over. Aim for smooth, steady drive.

Look Toward the Exit

Your eyes help direct your bike to where you are looking so look where you WANT to go. Turn your head to ratchet your eyes through to corner, always looking to the next visual target…entry, apex, exit. Read more about visual skills here.

What’s My Line?

It's important to get this right.
It’s important to get this right.

Try to select a cornering line that allows you to get your steering inputs done early and so the throttle finishes the turn. This usually means an outside-inside-outside path of travel. There are many advantages to this line, including a wide view through the turn and the ability to perform a quick turn-in that gets the bike turned early. It’s common for riders to fall in slow, tight corners because they introduce mid-corner steering inputs at the time when the front tire is already working hard.

Obligatory Crash Video

Here’s a video of my friend Matt who found out how a slight miscue in a slow, tight turn can put you on the ground. He was a rather new rider at the time and was spooked by the traffic. The bike was borrowed, so it was not familiar to him, either. He was unhurt. Erik from Twisted Throttle evaluates the crash protection from SW-MOTECH.

Why do you think Matt crashed? I’ll give my opinion in the comments below after some of you respond.
What tips do you find useful when dealing with hairpin turns?


Please Donate to Keep the Articles Coming

If you liked this article and the many other articles on this site, please toss a buck or five into the hat. It’s greatly appreciated!

    • Click the PayPal “Pay Now” button.
    • Then indicate quantity in $2.00 increments. Example: put “2” in “QUANTITY” field to donate $4.00, “3” for a $6.00 donation, etc.

Why $2.00? Due to the PayPal fee structure, a $2.00 donation is significantly more beneficial compared to a $1.00 donation.

Thank You!


Check out these related posts:

submit to reddit

Stay Informed: Subscribe NOW!
Be a Better Rider: Sign Up for Personal Training with Ken
Support Riding in the Zone: Buy a book
Support Riding in the Zone: Buy products from Twisted Throttle & Amazon
Twisted_Affiliate-Interphone-widget

10 Ways to "Look" Like a Pro

Look where you want to go!
Linda Blair, The Exorcist?

No doubt that being able to quickly and precisely flick a motorcycle into a corner can make you a cornering hero. However, the physical act of cornering is only one aspect of cornering mastery. Safe and skillful cornering also requires that you gather information about the corner—information gathered through your eyes.
The Eyes Have It
When cornering, your eyes alert you to any obvious hazards, help you determine how tight the curve is and allow you to identify any corner characteristics that might affect your safety. But, simply looking ahead isn’t enough to get the information you need. There is a difference between “Looking” and “Seeing”. Also, how you look is critical. A lazy gaze will get you nowhere fast. Aggressively scanning and searching for specific targets is much more effective.
Linda Blair head turn.
Look well ahead.

1. Look well ahead

The first thing to do is get your eyes up! The earlier you spot a hazard or identify a corner’s characteristics, the less likely you are to act out of panic.
Looking well ahead also reduces “speed anxiety” by slowing down the landscape. A slower perceived rate of speed offers a greater feeling of control and minimizes the effects of speed-induced anxiety.
When cornering, look as far ahead as you can, all the way to the corner’s exit if possible.
How far ahead you are able to see depends largely on the environment. You can scan to the horizon in corners that are open, flat and unobstructed. However, in forested or hilly locations you will encounter many blind corners that provide little sight distance. This lack of visual lead time can make it difficult to see unexpected roadway hazards until it is too late.

2. Match Your Speed to Your Visual Distance

Ride at a speed that matches the amount of visual lead time you have. If you are riding too fast to process the information, you will be behind the eight ball and not have enough time to react.
There are often roadside objects that hide critical information. Always enter turns at a speed that takes into account the lack of visual information and allows you ample time and space to avoid whatever might be around the bend.

3. Identify the Right Entry Speed

Skillful cornering requires accurate visual information about a corner’s radius, camber and surface quality so you can determine the right entry speed.
A too-fast entry speed is responsible for the majority of single-vehicle crashes as the panicked rider target fixates and runs off the road or grabs the brakes and crashes. Use visual information to determine whether your pace is within your comfort zone.

There's a lot to look for on the street.
There’s a lot to look for on the street.

4. Identify visual clues

By looking well ahead you can evaluate a corner’s unique characteristics and come up with a cornering plan. Certain roadside features can help you identify a corner’s character and allow you to establish a plan to help you decide what line you’re going to take and where you’re going to get on the gas.
One useful visual target that helps you make this plan is the “vanishing point” where the white painted fog lines or painted centerline visually converge.
On the track, there are no lines, so use the edges of the pavement. How soon the lines or pavement edges converge in the distance help to determine how tight a corner is and which way the surface slopes.
If the lines or pavement edges converge in the near distance, then you can count on a tightening corner radius. On the other hand, a distant vanishing point indicates a larger radius or a curve that is ending.
This information can also help you determine road camber or slope. When a road is positively banked, the road edges do not come together right away.

Look where you want to go.

5. Look in the direction you want to go

Looking where you want to go can help direct your motorcycle through the turn. This is commonly known as “visual direction control”. Visual direction control is essentially your eyes telling your mind where you want the motorcycle to go next.
When cornering, point your eyes to the corner’s exit to help direct your motorcycle on the desired path. Riders who discover the benefits of looking well ahead when cornering often comment on how much easier their motorcycle seems to turn.

6. Keep your vision wide and your eyes moving

Your eyes must move quickly between the corner locations while at the same time scanning for surface hazards. Keep the majority of your vision well ahead into the corner, however you may need to look down briefly to monitor the surface condition as it nears. Do this by using quick downward glances.
Continually gather information from near and far with upward and downward, and side-to-side search pattern. Scan aggressively to gather as much information as you can about the road surface and corner characteristics. Finally, look through the turn to the exit and identify what is in store farther up the road.

Always be looking for reference points when riding on the track.

7. Look for Reference Points

Reference points help you place your tires exactly where you need them to be. Reference points are somewhat less helpful or necessary on the street, because speeds are low where precision is less critical.
But on the racetrack where you visit each corner many times a day and where the speeds are much greater, reference points are critical and a relatively small miscue  can result in an off-track excursion.
Once you establish the best cornering line, you can then use reference points to make sure you are always on that line lap after lap. Cones, pavement stains and cracks, as well as distant visual targets (trees) can all be effective reference points.

8. “Ratchet” Your Eyes

To make visual direction control work for you, look into the curve and then continue to move your vision along the desired cornering path all the way to the corner exit as though your eyes are pulling the motorcycle through the turn.
Your eyes cannot help but stop to focus on small targets as you scan ahead. Look around the room, trying to not have your eyes “flick” slightly as you scan. You can’t. So let this natural occurrence work for you.
Imagine your eyes moving through a corner in a sort of ratcheting way, very briefly noticing visual targets and reference points along the way. Put all these “dots” together to make a smooth corner.

9. Look at the solution, not at the problem

Visual direction control can work for or against you. It can work against you if your eyes fix on a hazard that you need to avoid, which is what we tend to do under threatening situations. “Target Fixation” is the term used to describe this response. The problem is that if you look at a hazard, such as a patch of sand or the edge of the road, you will likely end up riding directly toward it.
If a panicked rider were able to keep his vision and attention focused on the corner’s exit he will have a fighting chance of making it. I’ve seen time and again riders who give up on making a corner even when the bike is capable of leaning further and completing the turn. Focus on the solution, not the problem!
The same goes with passing on the racetrack. If you fixate on the tail of the rider ahead you will have a harder time getting by. But, if you look past the slower bike and trust your peripheral vision to monitor the slower bike, then you can dispatch the backmarker much more easily.

10. Practice Your Visual Skills

Avoiding target fixation is easier said than done, because we are naturally wired to closely monitor threats with our eyes. It is therefore important to train yourself not to do what comes naturally and instead look away from a threat.
On your next ride, consciously look away from road surface obstacles, such as a manhole cover, pothole or road kill and look toward an escape route. Continue to increase awareness of this problem and practice to make the solution second nature.
When it comes to cornering, consciously look farther ahead. And don’t just look, but see the information that is most meaningful.
On the track, look farther ahead. If an obstacle, such as airfence, or a cresting hill blocks your view, look “through” it so your eyes are where you need them to be in the next second when the obstacle is no longer in the way.
What visual techniques have you discovered that help you?


Please Donate to Keep the Articles Coming

If you liked this article and the many other articles on this site, please toss a buck or five into the hat. It’s greatly appreciated!

    • Click the PayPal “Pay Now” button.
    • Then indicate quantity in $2.00 increments. Example: put “2” in “QUANTITY” field to donate $4.00, “3” for a $6.00 donation, etc.

Why $2.00? Due to the PayPal fee structure, a $2.00 donation is significantly more beneficial compared to a $1.00 donation.

Thank You!


Check out these posts:


How Can I help You? Online Coaching NOW AVAILABLE
Stay Informed: Subscribe NOW!
Trianing-Tours_LandingBe a Better Rider: Sign Up for Personal Training with Ken
Support Riding in the Zone: Buy a book
Support Riding in the Zone: Buy products from Twisted Throttle & Amazon
Twisted_Affiliate-Interphone-widget


How to Save a Front Tire Slide

Sometimes it's not possible to save it.
Sometimes it’s not possible to save it. www.motorcyclistonline.com

Is it possible to not crash when you experience a front tire slide? Maybe.
Both of my recent track crashes were the result of a sliding front tire (both were caused by me asking too much of a cold front tire). Sometimes it happens too quickly for you to respond. But, sometimes there is enough time to perform a maneuver that just may save you from a fall.

Survival Instincts Are a Bitch

Let’s say you are rounding a curve and the handlebar starts to feel vague in your hands. At the same time, your proprioceptors (aka kinesthetic sense) tell your brain that balance is being compromised.
Your brain is alerted to the threat and triggers your muscles to tense. The rush of panic and muscle tension happens in an instant. Many riders end up on the ground because their survival instincts cause them to overreact and make matters worse.

Saving the Front in a Corner

I’ve got bad news for you, that vagueness you feel at the handlebars is your front tire losing traction. This is bad, because a front tire slide is one of the most difficult situations to recover from. When cornering, the front tire is responsible for both lateral grip and direction control (steering). More times than not, front tire traction loss is the result of asking too much of the tire. Side forces from cornering, in combination with cold rubber and perhaps contaminated pavement is an easy recipe for tire slip.
When the front tire loses grip, it “tucks” underneath the bike and throws the bike and rider violently to the ground. But, is it possible to save yourself from falling?
To help the front tire regain traction (or at least not lose any more grip) you must first not add to the problem. This means staying relaxed (Good luck with that). With light handlebar pressure, the tire and suspension can work fluidly to manage surface irregularities.
If you tense on the bars, you will put stress on the front tire and risk pushing the tire over the limit of grip. Whatever you do, avoid trying to countersteer the bike into a deeper lean.
Assuming you can remain somewhat relaxed and neutral, the next thing to do is to relieve the work the front tire is doing. To do this, get on the throttle! I know, it’s counter-intuitive, which is why it’s not easy to do. But gassing it transfers load from the overworked front tire to the rear tire.This allows the front rubber to halt its lateral slide and keep rolling.
Yes, you will probably run wide, but hopefully you have enough road/track to let this happen. You can minimize this drift by using moderate throttle application to save the front tire slide. Just don’t goose the throttle so hard that you careen off the road or track or spin the rear tire.

Uphill Unload

A fellow instructor pointed out a caveat  to the common cornering situation. Dan mentioned what can happen to traction when you are going uphill. He witnessed a fellow rider (with a passenger) lose the front and crash in front of him just as the crashing rider was getting on the gas. Why would this happen if what I say about relieving stress on the front tire is true?
The likely explanation is that the uphill slope, in combination with the weight of a passenger and the application of a bit too much throttle, unloaded the front tire too much. He probably also added a bit of steering input that tucked the front tire beneath him. The lesson is that load management and traction management go hand in hand and you need to develop a keen sense of how various factors can affect tire load and grip.

The Knee Save

For those who are accustomed to dragging knee, it is possible to relieve front tire stress by levering the bike with your knee. Anything you can do to take pressure off the front tire will help the tire regain grip.

Saving the Front While Braking

The other way to experience a front tire induced crash is to overbrake so you skid the front tire. This can happen whether you are upright or leaned. If this happens, get off the brake, NOW! This will let the front wheel roll again so you can regain control. Then get back on the brakes (you were braking for a reason, right?). But, this time squeeze the front brake progressively. You can still brake really hard (less so if you are leaned), but it must be done gradually to allow time to put load on the front tire, which increases traction.

Practice? Really?

It takes a good amount of skill and presence to control front tire skids. Like all other tricky situations, practice and experience increases the chance that you can act correctly and save a crash. Practice? How? Ride in the dirt, my friend! Pushing the front tire is a regular occurrence when riding on loose surfaces. Learning to control slides in the dirt is less risky than suddenly needing to manage a slide on your street bike. With this experience, you can train and condition your mind and muscles to react properly when a slide happens.
The other way to train yourself to react properly is to push your bike hard enough to get it to happen. I don’t recommend this, because front tire slides can easily go wrong. But, if you eventually go fast enough at track days or when racing, you will inevitably experience the vague feeling of your front tire on the edge of traction loss.
DO NOT go fast enough to slide the front on the street!! You will die. On the street, it’s not likely that you will have enough time or space to pull off this hero maneuver.
What? You don’t ride on the track or in the dirt? Well, the next best way to practice is to visualize successfully performing the maneuver. Imagine yourself cornering hard, feeling handlebar vagueness and then gradually rolling on the throttle as needed to drift the front. It’s not ideal, but it’s the best way to prepare for saving a front tire slide.

 Me and the ZX6R Monticello, NY.
When you corner hard, you have to expect slides.

Expect It

Another way to prepare for front tire slides (and many others) is to expect them to happen. This pertains to all times when you are in traction-reduced situations, including when cornering or braking hard.
Have you experienced a front tire skid or slide? If so, how did that work out for you?


Please Donate to Keep the Articles Coming

If you liked this article and the many other articles on this site, please toss a buck or five into the hat. It’s greatly appreciated!

    • Click the PayPal “Pay Now” button.
    • Then indicate quantity in $2.00 increments. Example: put “2” in “QUANTITY” field to donate $4.00, “3” for a $6.00 donation, etc.

Why $2.00? Due to the PayPal fee structure, a $2.00 donation is significantly more beneficial compared to a $1.00 donation.

Thank You!


Check out these posts:


How Can I help You? Online Coaching NOW AVAILABLE
Stay Informed: Subscribe NOW!
Trianing-Tours_LandingBe a Better Rider: Sign Up for Personal Training with Ken
Support Riding in the Zone: Buy a book
Support Riding in the Zone: Buy products from Twisted Throttle & Amazon
Twisted_Affiliate-Interphone-widget


5 Bad Habits You Must Fix, NOW!

Crash-SignNo matter how “good” a rider you are, it’s likely that you have at least a few bad habits and attitudes. Poor habits and dangerous perceptions can develop over time without us even knowing it. That is, until we experience a close call or crash. Let’s take a look at a few bad habits that many riders possess.

1. Believing You’re a Better Rider than you Are

A lot of RITZ blog readers would be considered “experienced” riders. But, the truth is that experience alone does not make you a proficient rider. I can’t begin to count how many so-called experienced riders I’ve encountered who demonstrate a significant lack of proficiency. Unfortunately, unless the rider admits that he or she has a problem and asks for advice, their poor riding will continue indefinitely and ultimately lead to a mishap.
Unsolicited advice usually is not appreciated, so knowledgeable riders are reluctant to share their wisdom to the riders who need it most. Attempts to enlighten the problem rider often results in exclamations about how many years of riding experience they have and that they know all they need to know to get by…never really knowing the danger they are in.
The solution? First, take a good look in the mirror. What skills are you lacking? (I’m sure there are many, but let’s stick with motorcycle-related skills for now). Next, get the knowledge and training you need to bring all of your skills up to snuff. Thirdly, remind yourself that what skills you have are perishable and need to be kept fresh.
Promise yourself that you will purposefully practice braking, turning, and swerving. It doesn’t have to take a lot of effort to keep skills sharp. Learn about proper cornering technique and then practice it on your Sunday rides. And be sure to learn about all the ways to keep yourself safe in traffic and practice on your way to work every day. Over time, you just might become as good as you think you are.

Always remember that you are vulnerable...and hard to see.
Always remember that you are vulnerable…and hard to see.

2. Forgetting You Are Vulnerable

Experience can often lead to complacency. If you ride many miles without an incident, you are at risk of thinking that riding a motorcycle is not as dangerous as it’s made out to be. This perception leads to many crashes and fatalities. Complacency and overconfidence can occur when you don’t recognize subtle signals that indicate just how close you are to catastrophe.
Get into the habit of recognizing clues that should alert you to threats. Make a concerted effort to scan the landscape and roadway for anything that can turn into a hazard, such as a reflection on the windshield of a car that is rolling toward you. Ask yourself whether the driver sees you and what are the chances that he will accelerate in front of you.
Evaluate each clue to determine whether you can reliably read what is being communicated. For instance, direct eye contact with the driver may indicate that the he sees you, but don’t count on it!

What's around that corner?
What’s around that corner?

3. Assuming the Coast is Clear

You know what they say about making assumptions, right? “They make an ASS out of U and ME”.
One of the most problematic situations is when a motorcycle is approaching an intersection with other drivers waiting to turn left across the rider’s lane. Part of the problem is that the approach speed of a narrow vehicle is much harder to judge compared to a wide vehicle. This is why motorcyclists experience drivers “cutting them off”.
The drivers aren’t necessarily out to get you; they more likely misjudged your approach speed and thought that they had plenty of time to make the turn. The message is to never assume that a driver who appears to see you will not cut in front of you. See “The Top 2 Survival Tips That Will Save Your Life” for more on this topic.
A lot of riders also assume the coast is clear around corners. Depending on the region you ride in, many, or even most corners you encounter do not provide a clear view of the corner exit. Hillsides, vegetation and roadside structures all conspire to block your vision.
Too many riders approach corners at a speed that does not allow the time and space to stop or maneuver if a mid-corner hazard were present. It’s a good idea to enter blind turns slow enough so you can confidently avoid a hidden hazard. If no hazard exists, then you can roll on the throttle and accelerate safely though the turn with no drama.

Caroline
Caroline wears ATGATT

No Gear=Greater Risk of injury

4. Not Wearing ATGATT

ATGATT is an acronym that stands for “All The Gear, All The Time”.  MY definition of “All the gear” means helmet, appropriate eye protection, jacket and pants with protective armor, gloves, and over-the-ankle boots. The obvious reason for buying and wearing all this gear is for protection in the event of a crash. Since motorcycle riders don’t have bumpers, airbags, crumple zones and safety glass surrounding us, we must wear our protection.
Unfortunately, way too many motorcyclists choose not to wear full protective gear. In states where helmet laws are enforced, riders are compelled to wear this most important piece of protective gear, but helmet choice states leave the option of helmet use to the rider. Whether you agree with helmet laws or not, it’s hard to dispute the benefits of having a helmet strapped to your head when you and your bike separate at speed.
Currently, no states require any other protective gear to be worn, with the exception of eye protection. This means that you can ride legally in a tank top, shorts and sandals. Good luck with that.
The reasons why riders do not wear protective gear often include image, peer pressure (you gotta look cool), and cost. But, there is plenty of inexpensive protective gear that meet most rider’s fashion sensibilities while providing decent protection (at least for a single crash).

Both speed and lack of visibility caused this crash.

5. Being an Idiot

This topic can cover a lot of ground, but let’s focus on your attitude when you ride. This pretty much means riding with your head securely screwed onto your neck. Letting destructive influences like ego, peer pressure, intoxication, and distraction make decisions for you will eventually lead to a hospital visit. So, just say no to stupidity. ’nuff said.
What would you add to this list of bad habits?
submit to reddit


Please Donate to Keep the Articles Coming

If you liked this article and the many other articles on this site, please toss a buck or five into the hat. It’s greatly appreciated!

    • Click the PayPal “Pay Now” button.
    • Then indicate quantity in $2.00 increments. Example: put “2” in “QUANTITY” field to donate $4.00, “3” for a $6.00 donation, etc.

Why $2.00? Due to the PayPal fee structure, a $2.00 donation is significantly more beneficial compared to a $1.00 donation.

Thank You!


Check out these posts:


How Can I help You? Online Coaching NOW AVAILABLE
Stay Informed: Subscribe NOW!
Trianing-Tours_LandingBe a Better Rider: Sign Up for Personal Training with Ken
Support Riding in the Zone: Buy a book
Support Riding in the Zone: Buy products from Twisted Throttle & Amazon
Twisted_Affiliate-Interphone-widget

Barber Track Day Videos – Street Triple R

Sometimes, video is worth a thousand words, so here I present three videos from the recent trip down to Barber Motorsports Park in Alabama.
Below is a video that Aaron (Aprilia RSV4) shot of my first few warm up laps during that last session. The video does not show just how much of a roller coaster this track is. The elevation changes are significant. The Museum turn where we ride over the curbing is a less extreme version of the corkscrew at Laguna Seca.

Here’s one where I follow Tony onto the track and then he takes off. Tony got a hang of the track pretty quickly. It was about 45 degrees but sunny, so after a few slow laps, the tires were able to get warm enough for us to lay down some fairly quick laps. I was still learning the track and I can see several areas where I could maintain higher entry speeds and get on the gas earlier. Can you spot these places?

Ken follows Keith on his new-to-him 1100 Monster EVO racebike:

Below is a video posted by Keith (Ducati 1100 EVO Monster). I appear after 4 laps or so. Thanks Keith!

Barber motorsports part X-Act Nov 24 from GYRO BOX on Vimeo.
 

Subscribe to my Newsletter Mailing List to receive update notices in your email inbox.


Please Donate to Keep the Articles Coming

If you liked this article and the many other articles on this site, please toss a buck or five into the hat. It’s greatly appreciated!

    • Click the PayPal “Pay Now” button.
    • Then indicate quantity in $2.00 increments. Example: put “2” in “QUANTITY” field to donate $4.00, “3” for a $6.00 donation, etc.

Why $2.00? Due to the PayPal fee structure, a $2.00 donation is significantly more beneficial compared to a $1.00 donation.

Thank You!